Malo e Lelei, Reader!
On Tuesday @10:08 we had to pack up for our final baking session. I’ve recently brought a recipe from Food Technology to my teacher so we could make it at school for a fun project. The recipe is about Weet-Bix Slices – A beloved dish our peer-kiwis enjoy. It’s popular in New Zealand because the dessert is associated with Weet-Bix, a breakfast famous in NZ.
In class, we had to go in our groups depending on the table we’re on, so the people in my group are also the people who sit on my table. There are two year 8’s (me and my W friend Danielle) along with three year 7’s, which makes 5 in our group. 20 people were there that day so there were 4 groups of 5. We made the batter in class using a plastic snap lock bag to mix our weet-bix to prevent paru mess and to make our lives easier. We got the fun out of that, especially baking itself.
Ingredients for the Weetbix slices
- 4 Weetbix. crushed
- 1 cup flour
- 1 and a half cup of white Sugar
- 1 tablespoon coca power
- 1 teaspoon baking powder
- 150g Butter Melted
- half a teaspoon vanilla essence.
Method.
- Preheat the oven to 180 C fan bake, bake for 10 minutes. Line a baking tin ( approximately 182cm x 28cm ) with baking paper.
- Place weetbix, flour, white Sugar, cocoa powder and baking powder in a large bowl.
- Mix with a wooden spoon to combine, then make a well in the centre.
- Melt butter for 30 second’s in the microwave.
- Add melted butter and vanilla essence to the flour mixture
- Mix together then press into a baking tin – ( with baking paper )
- Bake for 10 minutes until the slice is cooked but still soft to touch in the centre
- Remove from the tin to cool on the chopping board
- Ice while hot
Icing Ingredients
- 1 And a half cups icing sugar
- 1 And a half desiccated coconut
- 4 Tsp cocoa powder
- 25g Butter
- 2 – 3 tablespoons boiling water
Method
- Mix Icing Sugar, coconut and cocoa powder together in a bowl.
- In a small bowl, Add butter, Then gradually add the boiling water to melt butter, blending to form a spreadable icing
- Spread over the slice while hot cut into squares once cooled a little
Those were it.
We didn’t get to create the icing because my teacher mistakenly forgot to bring the icing sugar, which is okay. When we finished baking as a group in class, we then relaxed a bit for break time then after eating then playing the bell rang for class. Once we returned, we had to gather our stationary items to create a paper bag that would hold our slices. Watching tutorials on YouTube helped us a lot. Making our way to the hall where we can bake our dessert, we sat there to make our bags as we waited.
WALT
Measuring, sharing, co-operating, also giving others a go. I’ve learnt a lot more in food tech itself, what we did in class was relevantly the same as how I felt in technology.
The manufacturer for my group which was titled ”group #2” out of the other 4, our final product came out as equal as the others, a crispy exterior with a soft brownie like texture within the middle of the dessert. It tasted mid in my opinion. I was totally entertained as we baked, seeing others learn the things I did made me feel like a sort of hero.
As the final product came to us, I actually found it repulsively appetizing. I had mixed feelings about the way my group produced it because as they were mixing it in the snap lock, it wasn’t completely assorted well. I didn’t want to help them fully mix the whole batter together because that’ll just give me a selfish reputation; despite the fact that a third of the people in my group are year 7’s, I definitely had to give them a chance to let them learn.
Thank you for reading. Any questions please comment them down below including your thoughts. Correct my spelling/punctuation/grammar please!!
Bye!
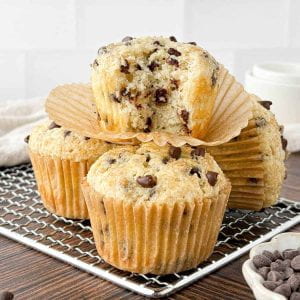
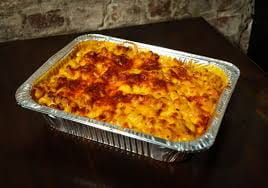 It looked similar to that but less burnt and more with a crispy aspect.

 FOR REFERENCE THIS IS WHAT THE CINNAMON PANCAKE LOOKED LIKE REMOTELY. (I can’t get the photos of what I’ve baked with my group because it’s inserted in the Papakura intermediate’s photo album 🙂 ).